IKEA Hack: Vigdis Chalk Paint Dye and Stencil
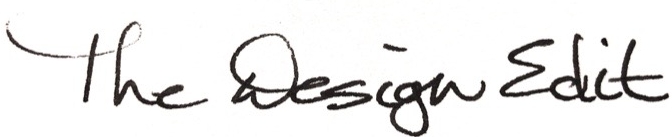
If you caught my segment on The Marilyn Denis Show that aired in mid May (check out my behind the scenes post), you may have seen this little project before. That's the TV studio vignette above, and the project I'm walking you through here is the pink pillow perched somewhat awkwardly at the front of the chair. The fact that the episode repeated this week was a bit of a kick in the pants for me to get the followup post up with a little more detail on this project. (I'll follow this one with a post about a hand-painted Vigdis cushion cover and a gold-accented Värgyllen cushion cover.) I think the segment ran 6 minutes on the show, which is just a bananas short amount of time to give the details on DIY instructions, but that’s how TV works :::shrugs shoulders:::
The Inspo
I pulled my creative direction for this cushion cover from two sources:
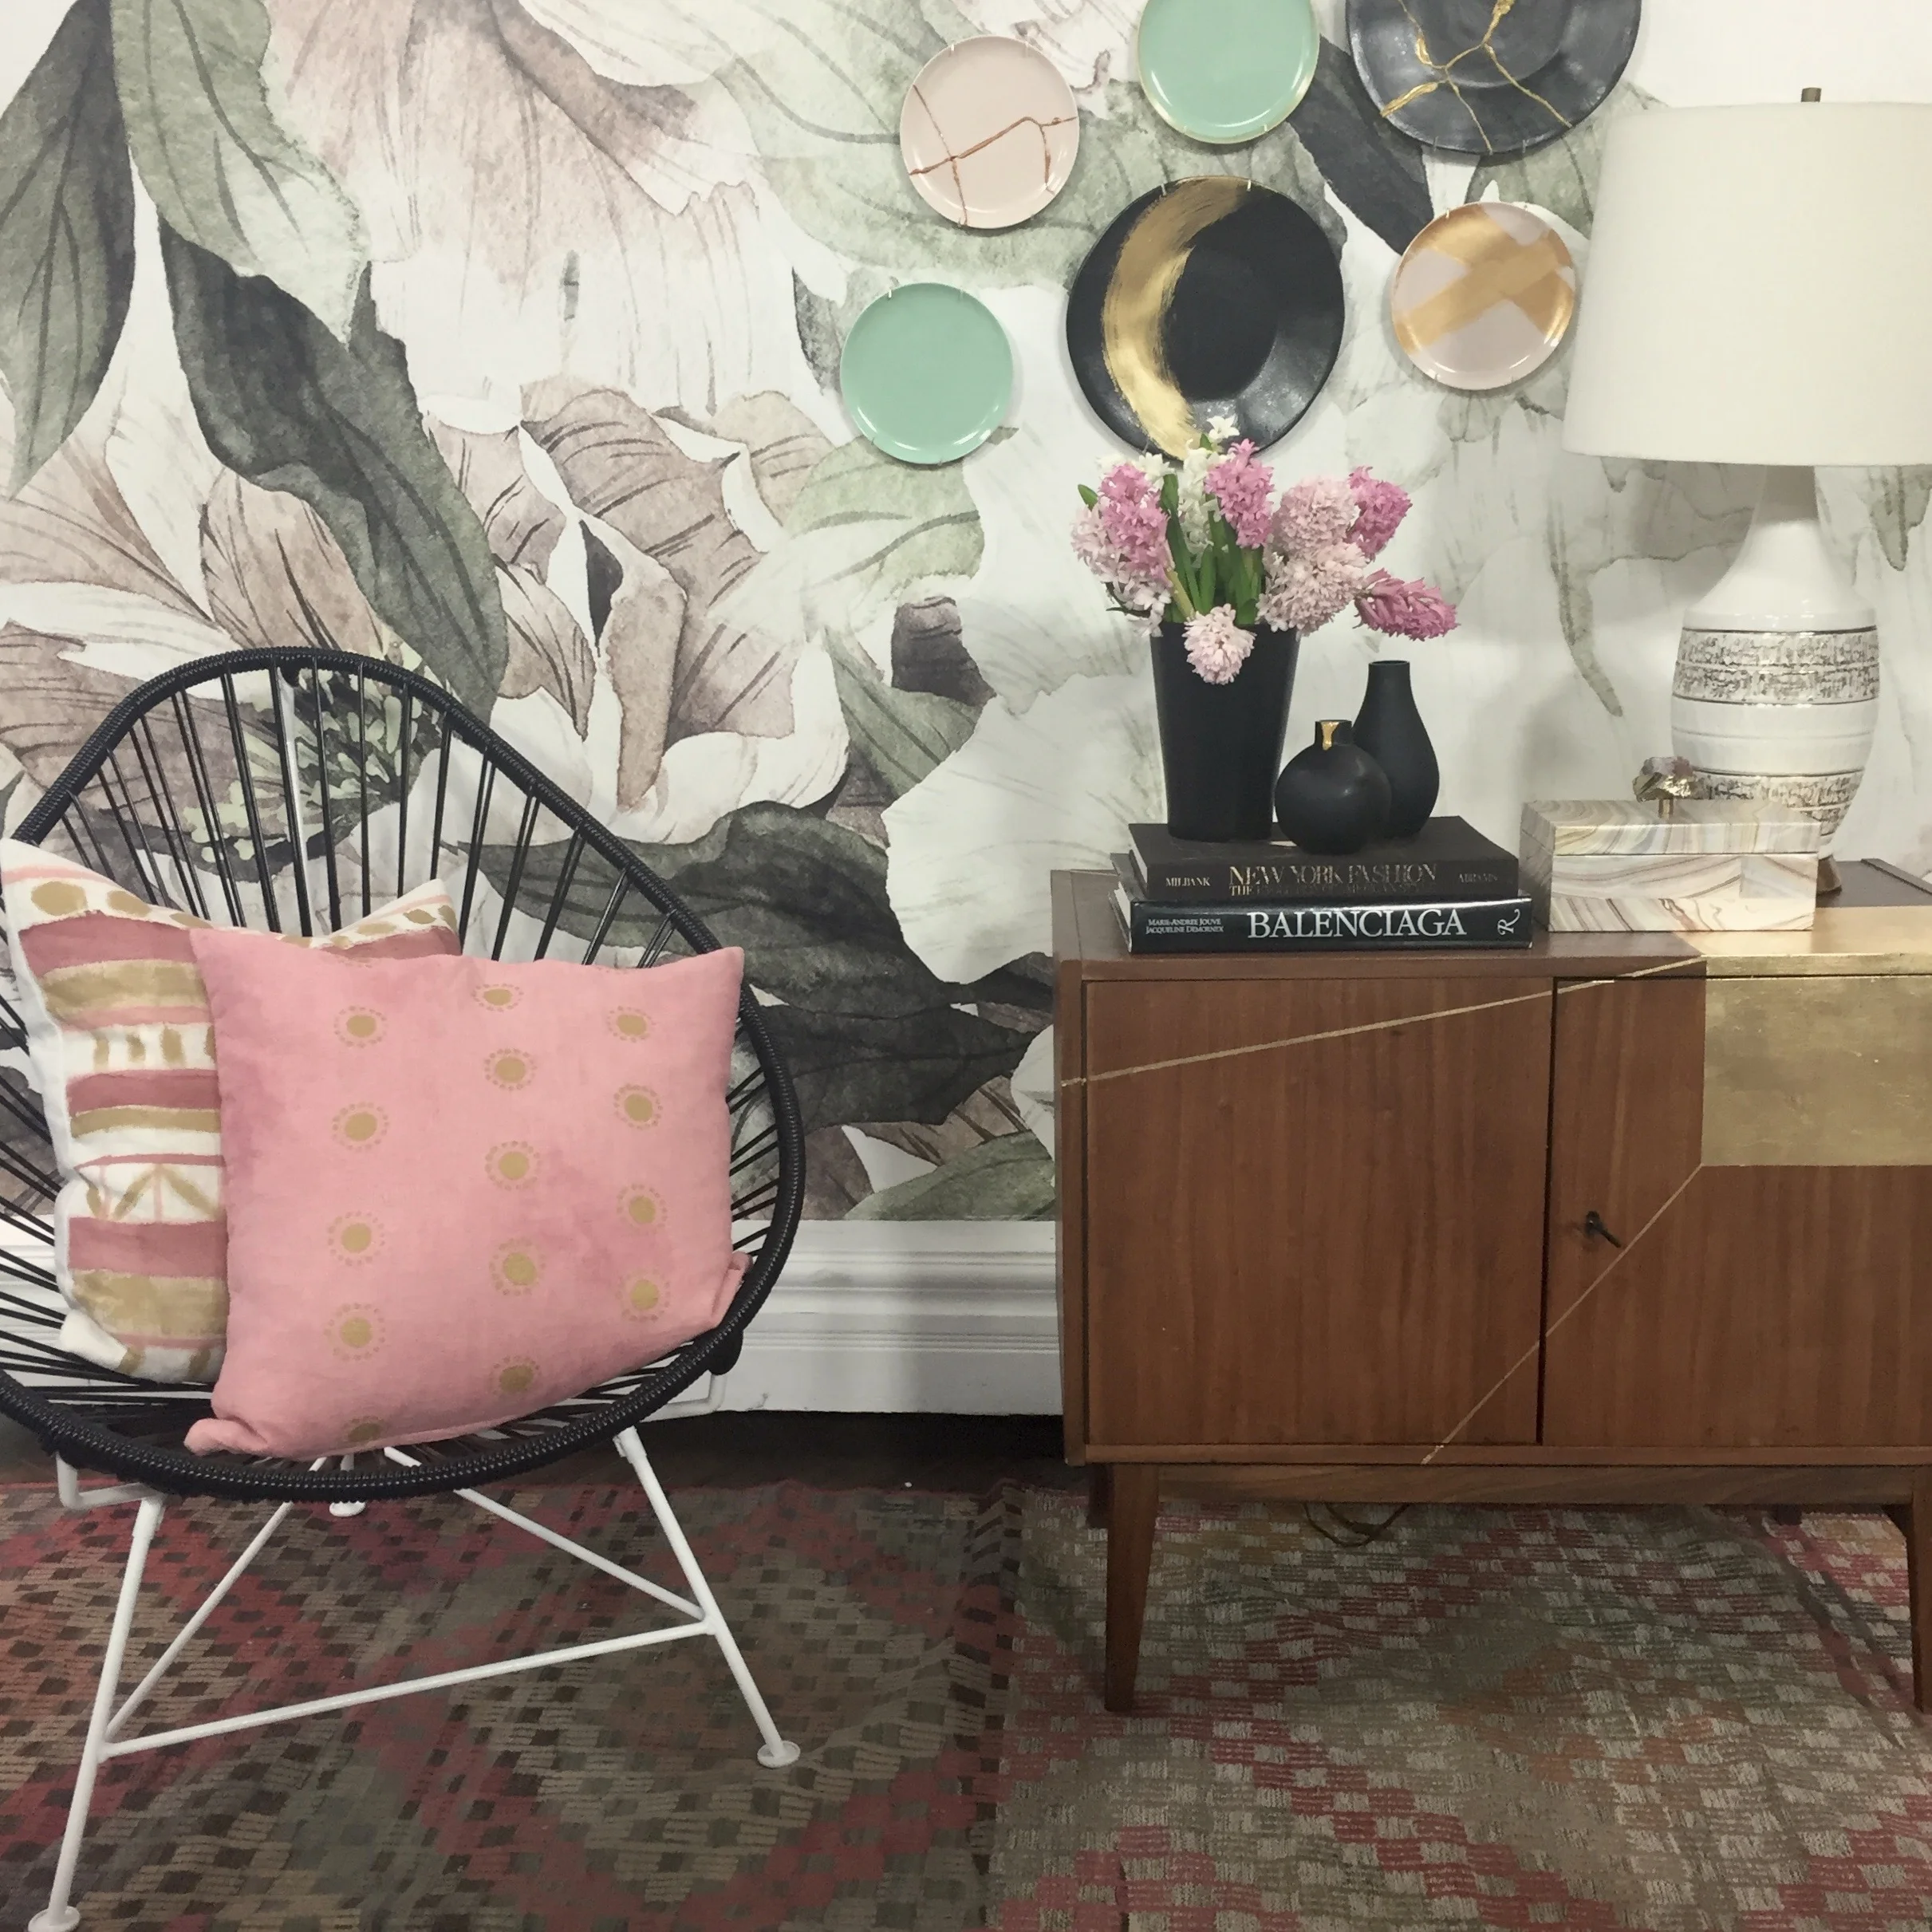
1. HEIMTEXTIL
Last winter I attended the Heimtextil show in Frankfurt. It's the world’s main trade show for all home textiles and wallcoverings. It’s astoundingly massive and full of delicious inspiration. My favourite hall was the one with all the vendors from India and their spectacular handcrafted products: block print and screen print textiles, handwoven carpets, throws, bedding. But here’s the thing: in no way do I equate my little project with these amazing goods. I’m not trying to rip off their designs I am just inspired by the palette and technique. I just wanted to give it a shot.
2. ANNIE SLOAN CHALK PAINT
After the Heimtextil trip I was fortunate to be among a small group to enjoy a DIY seminar with Chalk Paint creator and guru Annnie Sloan here in Toronto. She was in town for a home show appearance and hosted the seminar for a group of press and bloggers. At the seminar we learned about combining colours, adding wax, special finishes and painting on fabric. That last part was the one the inspired me the most. That is, until she showed several examples of linen that had been dyed using Chalk Paint. My eyes popped out of their sockets. The fabrics were heavy antique French linens and the colours were all mellow and gorgeous. I got a couple of sample pots to take home from the seminar and I already had a couple at home, so I tried the dying techinique right away and am hooked. I have tried dying projects several times before the standard way — with RIT dyes. The results are always impressive but the process is challenging. You just really don’t want to let that stuff get on ANYTHING because it will stain like mad — I mean, it is dye after all. Now that I'm a condo-dweller with no basement laundry room or backyard for such projects, the ease of the Chalk Paint dye technique had immediate appeal. It's dead easy to use as dye. Here are all the deets on my DIY:
You Need
- 1 IKEA Vigdis cushion cover, prewashed and dried. (If you don't have a Vigdis, choose another cushion cover made of pure cotton or pure linen since natural fibres accept dye and paint the best.)
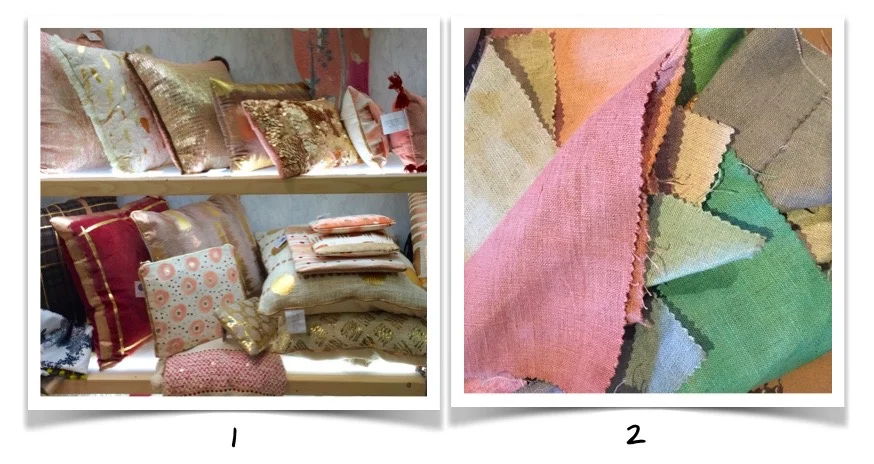
- 1 pot of Pébéo Setacolor gold fabric paint
- 1 sample pot Chalk Paint in Primer Red (or your desired colour)
- 1 Annie Sloan Circles stencil
- 1 stencil brush
Also (but not shown)
- 1 plastic dish pan or large bowl
- 1 stir stick
- 1 kitchen garbage bag
- iron
- 1 down/feather cushion filler
Instructions
There appear to be a lot of steps, but trust me, it's super easy, not very messy, takes little or no artistic skill and easily passes my DIY Bullsh*t Test.
DYE THE CUSHION COVER
- Add room temp water to the dishpan to a depth of about 3 inches up the sides of the dishpan.
- Pour about 1/4 to 1/3 of a sample pot of Chalk Paint into the water. This dye process is experimental, so start by adding a small amount then stir well, then add a bit more to darken the dye mix, stir well again. Keep stirring to break up any paint globs along the bottom of the pan..
- Submerge the cushion cover in the paint/water dye solution. Swish it around with the stir stick. If any paint globs get on the fabric, rub them in well to work the colour so it blends well. No worries about using your bare hands for this. Chalk Paint washes away easily with soap and water. Swish the fabric around and wring it as you wish to work the colour into the fibres.
- Hang to dry so that it drips over the dishpans. Once dry, dampen it a bit again with a few splashes of water, then put cushion cover in the dryer to fully dry and set the colour.
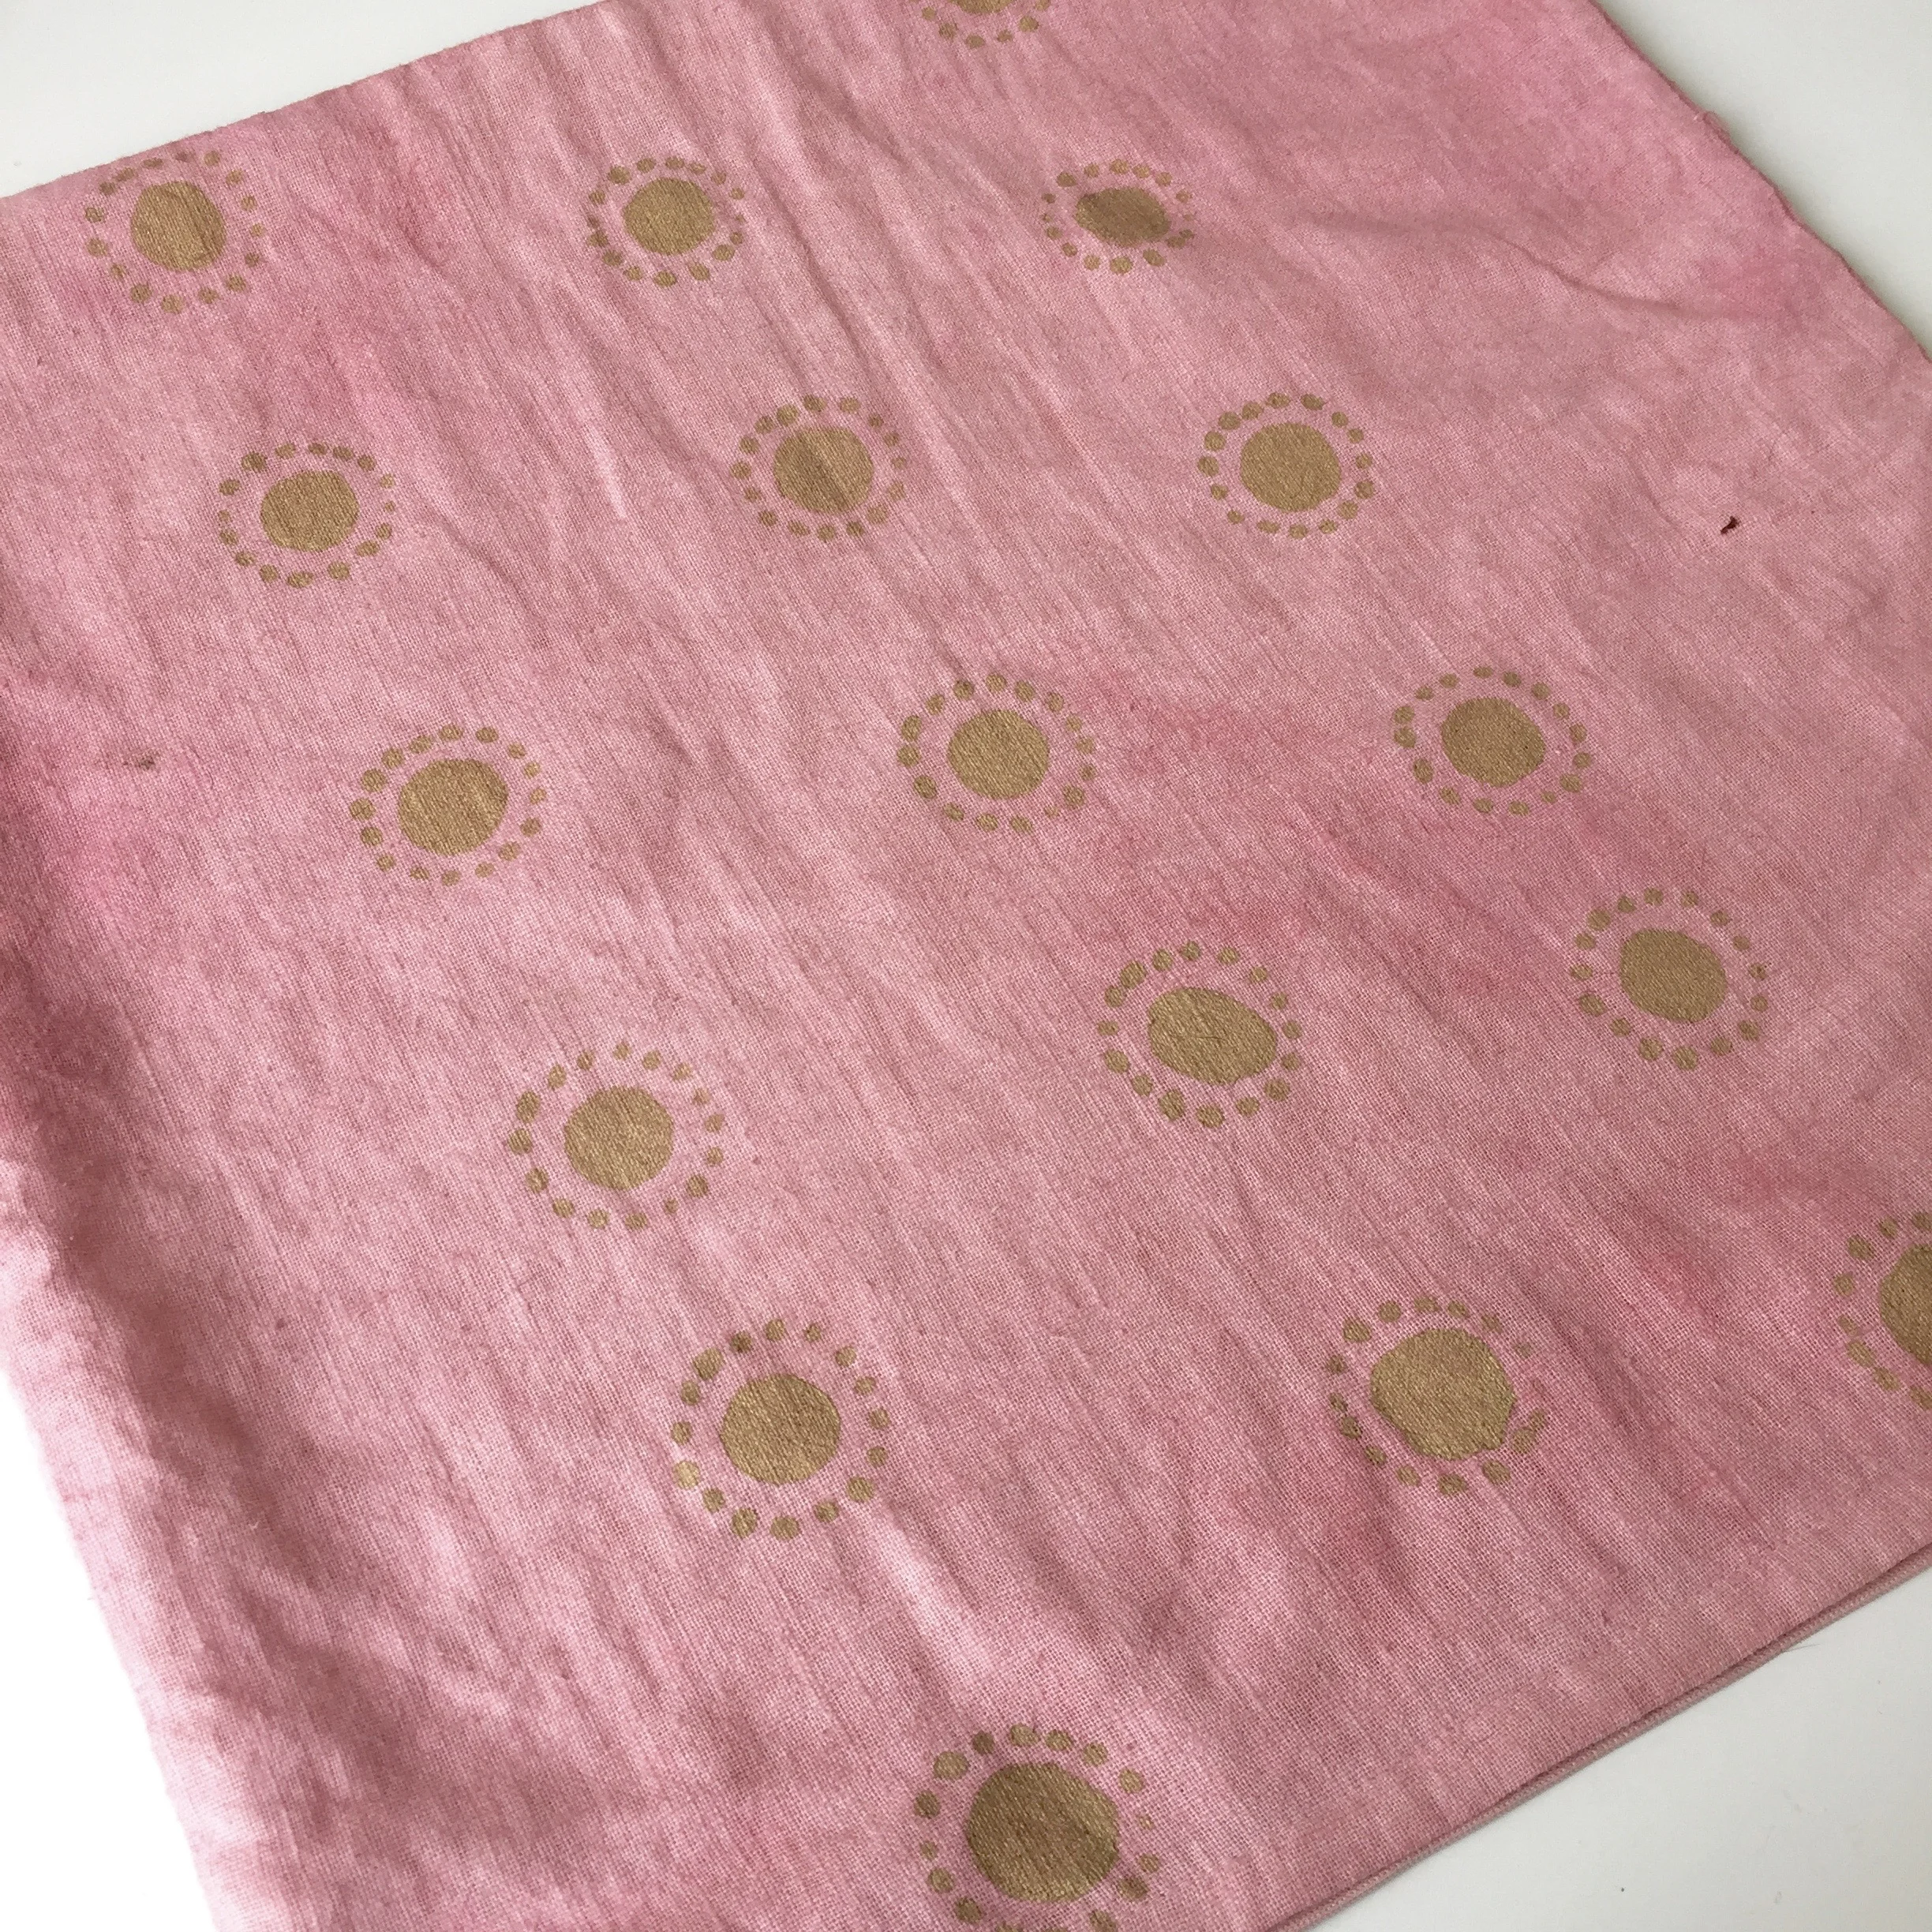
Above is how my cushion cover looked after this initial dying process. The colour ended up being a pinky-red that looks as if it has faded over time. I love the vintage look.
STENCIL THE DYED CUSHION COVER
Inspired by the hits of gold I had seen in Frankfurt (and because my Marilyn Denis Show segment was to be about gold projects), I kicked things up a notch with the addition of some gold stencilling.
One of the most challenging aspects if DIY for me is knowing how much is too much — when to stop. I decided before beginning that I would keep this treatment understated and just do three rows of the dots.
- Place a kitchen garbage bag or other plastic inside cushion cover so that fabric paint won’t bleed through. Hold stencil in place. Dip brush in paint. Blot off some of paint.
- Apply paint to stencil.
- Repeat these steps to complete row of stencil.
- For next row, positon stencil so the dots in row 2 are lined up with the spaces between dots in row 1.
- Apply paint to stencil as described above.
- Repeat for third row, again positioning stencil so dot in row 3 are lined up with spaces between dots of row 2.
- Allow paint to dry.
8. Once paint is dry, use iron to set colour according to paint packaging instructions.
9. Stuff with cushion filler, style, photograph, enjoy!